Description Of The System
The main menu displayed upon successful login has the| following:
Form Management
This section deals with the management of the forms and their contents including the fields through which the form is filled. It is a functionality that is rarely used, as after the definition of a form a while passes by for data management. It is also advisable, for the users, not to engage themselves very much with this section
Fields
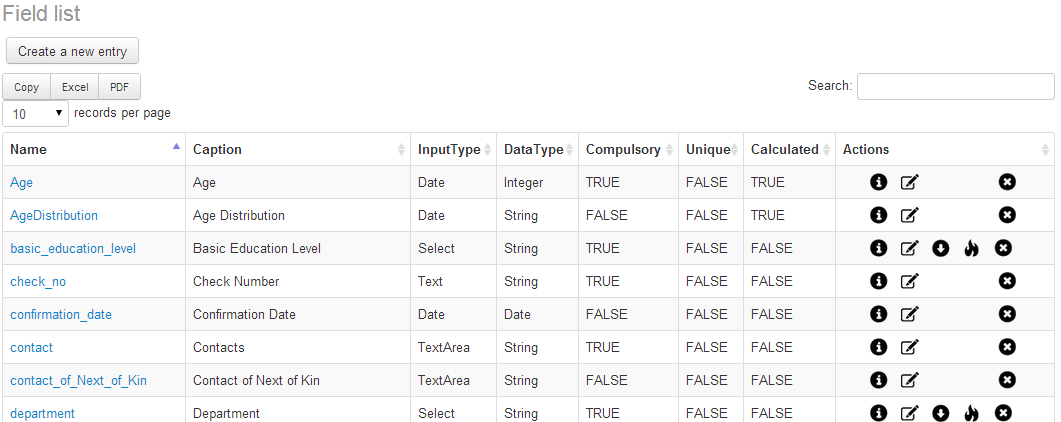
fig 4: Fields Interface
This part of the system is used to add, edit and delete database fields which are used to hold data supplied by the user. Examples of the fields include fname (stands for first name), lname (stands for last name), etc. The table shown in the above screen shot shows a specific field, its input type, data type, caption, a mark to show whether it is compulsory or not, and options to add, edit or delete.
Note
For the fields with the combo input type click on the icon in between the “edit” and “delete” options to assign more options.
Forms
The interface displayed after clicking the form option looks as follows:
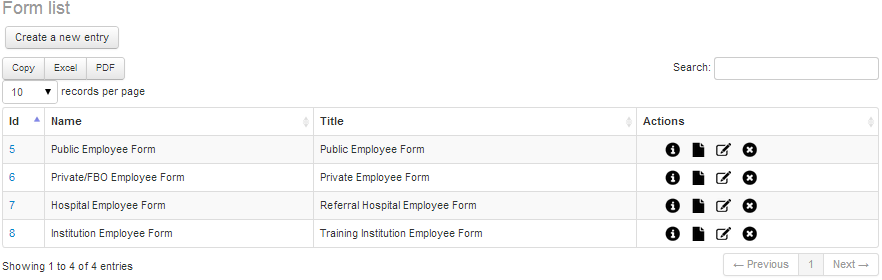
fig 5: Interface for editing the form and adding details
It displays a list of forms already added into the system. On the right hand side of each form are the options to edit form details, design the form and assign it the fields you want and the delete option. On clicking edit, the following screen appears

fig 6: Interface for editing the form and adding details
Click the specific field on the left to add it on the form. Use → to add a specific field on the form and ← to remove the field from the form.

fig 7: Interface for designing the form and assigning it the fields you want.
On the second option, design, the above screen should appear. Put the names of the form fields you want and for each field assign the database field corresponding to it and then click on the “Save Form” button to save the form. At any point during the design of the form, clicking the “Reset” button should instigate clearing.
Data management
This is the part where every day uses of the system depend. It contains the functionalities which involve the regular management and use of Human Resource data.
Data Entry
In here you can select the forms designed in the previous part so that you can populate data.
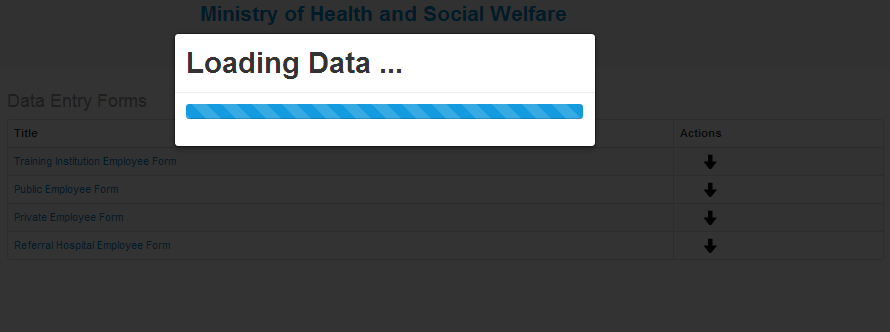
fig 8: List of form available for entering data.
By clicking on a yellow down arrow, the data entry form for populating data will be opened as displayed in the figure below.
An example of the form ready for data entry is as follows:

fig 9: Form ready for data entry.
Fill the form with the appropriate data then click on the “Save Data” button to submit data to the database. There are a few things to notice, though.
Of these fields there are compulsory ones which need to be filled in for any data entry to be successful. The best way for a new user is to put a cursor in each field and read the message that pops up as shown in the figure below

fig 10: A message to describe the data field
Records
This option allows you to view the records that you have already entered into the system. If records option is selected, it will list available forms, with two options in each form. “View All” records and “search” record option.

fig 11: View records options
If you select search records, the lens‐like button, the system will provide you with a text box to enter your search key. The records can be searched using and of the available fields, for instance firstname, middle name, surname, employee check number, etc.

fig 12: Search record option
On the other hand if View all records options is selected, the system will output all records that has already been entered into the database. This is a representation of raw data only.

fig 13: A list of records in the system
At the end of each record row, there two options: (Edit Record), in case you need to update some information of a particular record, then you have to select edit record option, and the form will be opened for you to update the selected record.
Another option is next section. which stands for Record’s History Management. This is discussed in the
History Management
By Selecting History option of a particular record, that record’s history will be displayed as it has been added before. The following diagram indicates how history of a particular record is displayed. In case there is no history for that particular record, only two options “Add history” and “Back” will be displayed for you to add history of that record if any.

fig 14: History Information of a record
If Add History is selected, a form for adding record’s history will be opened, for you to add history.

fig 15: Add History
In the history type one selects whether it is a history related to “Education Level” (if a staff has just completed some studies or “Terms of Employment” (for example from volunteering to contractual). It depends on what history is to be added.
After filling in the record, one has to select the “keep this as current record” check box. This will change the record of an individual to include the just entered changes.
In Service Training Management
This refers to different courses, mostly short courses taken by staff in the institution. This, HRHIS training is one of those courses. The following diagram indicates how In service training of a particular record is displayed. In case there is no In service training for that particular record, only one option “Add New” and “Back” will be displayed for you to add history of that record if any.

fig 16: In service training information of a record
As in history management, there is a button for add new, which leads to the recording of these in service training. The following is the interface after “add new”.

fig 17: In service training information of a record
Organization Units Management
This section of the system has four main parts: Organization Units, orgUnits Groups, OrgUnits group sets and Generate Structure.
Organization Units
This part of the system displays all organization units (e.g. regions) with options to see all the children which fall under a particular organization unit (e.g. districts). On the right hand side of each organization unit displayed there are also options to edit and delete a specific organization unit.
An interface for displaying organization units looks as follows:
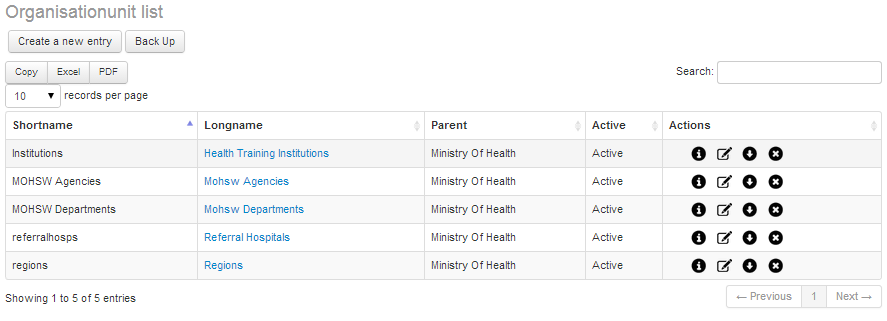
fig 18: Interface to display Organization Units.
If you opt for the down arrow then they get the children of that particular organization unit. In the above case, the following will appear

fig 19:Interface for the MOHSW Children
The following is the brief description of the icons displayed in front of each organization unit
table explaining the editing buttonClick on the “edit_image ” option to edit information under a particular organization unit, “down_image” display children under a particular organization unit and “delete_image” to to delete a specific organization unit. To edit information under the particular organization unit click on the edit option and the form similar to the one shown below will be displayed where you will be required to fill the details and click the “Edit” button to commit the changes.

fig 20: Form for editing organization unit details
Organization Units Groups
Related organization units can be grouped together to help with the analysis and use of data. With this option, one can add as many organization units groups as possible. Example of the organization units groups can be hospitals, health centers, dispensaries and others.

fig 21: Interface for displaying organization unit groups
You can edit or delete the details under a specific organization unit group by clicking the correct option. Click on the options as the ones shown in the previous section to edit, delete or add new organization unit group. See the following screen shots: This screen shot is the same as the one to be used in the course of creating a new group

fig 22: Editing organization unit group details.
Organization Units Groups Sets
OrgUnit Group Sets are meant to group the groups, again, for analysis and use of data. This part of the system is used to create and edit organization unit group sets. The procedure and interfaces used are as shown in the figure below:

fig 23: Creating new organization unit group set.
Enter the group set name then select appropriate group set members on the left; Using the → or ← add or remove the group set member to/from the box displayed on the right hand side. Having selected the group set members click the “Add” button to submit the group set to the system.